![]() InDesign has a number of different tools to help you edit a document quickly and easily. Two of my favorites (especially when working with large copy heavy documents) are text threads and find/change.
InDesign has a number of different tools to help you edit a document quickly and easily. Two of my favorites (especially when working with large copy heavy documents) are text threads and find/change.
Text Threads
Text threads allow you create one continuous stream of text that flows through multiple text boxes. This is especially helpful in book and brochure design when you have a lot of copy that need to stay connected. Below is a layout that demonstrates how to begin using text threads.

When you insert more text into a text box than it has room for, a red box with a plus sign will appear in the bottom right corner. Double click on that red box and a new box will appear with the remaining text that was unable to fit in the first box. These two boxes are now linked. Resize the second box as necessary and repeat the process if there is still more text remaining.

When you go to click on one of those text boxes, you will notice these blue diagonal lines indicating that the text boxes are linked. Now whenever you add, subtract, or change any formatting of the text, everything inside those boxes will arrange itself accordingly. For example, let's say I needed to delete the highlighted paragraph in the image below:

The text from the third box now automatically moves over to make up for the adjustment, saving the hassle of cutting and pasting from one text box to another:
Using text threads is a great way to ensure that all of your information stays together when you make edits to it. If you need to resize or move around some of your text boxes, all of the text will move with you and flow into the other boxes as needed.
Find/Change
Using find/change allows you to make specific or global changes to your document. This is especially helpful when you have to edit something that appears multiple times, you only have to make the change once. Using the same layout from above as a base, we're going to change all the instances of "Alice" to "Alex". Find/change is located under edit and looks like this:
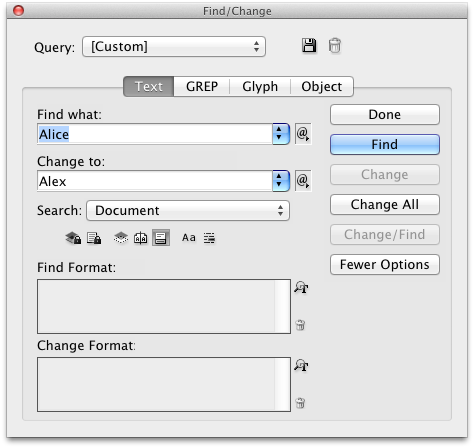
Fill in the find and change fields appropriately. If you click "find" the first instance of the word you would like it to find will be highlighted in the document. The "find" button will then turn into a "find next" button which will move you through the document. If you want to make a global change, select "change all" and every instance of that word will be affected. The format fields in the bottom of the window allow you to be more specific, you can include things like colors or typefaces and find/change will only look for words that fit within those guidelines. Find/change allows you to edit other parts of the document as well, including glyphs and objects. Now that we've changed the Alice to Alex, were going to change the circles from black to pink. Click on the object button in the find/change menu:
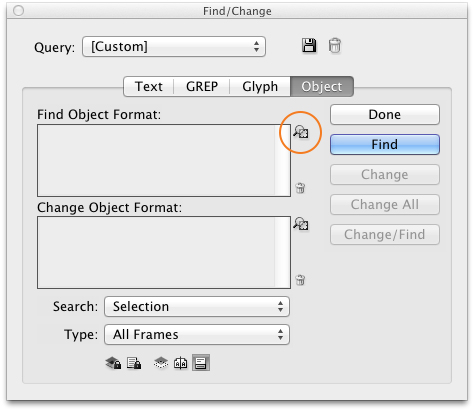
You will see that it asks you to specify the object format it should look for. Click on the "specify attributes to find button" next to "find object format" (highlighted in orange above) and the window below will open:

Here you can find all of the different styling tools and effects that an object might have. Specify what the format of your existing object is and click OK. Then click the same button next "change object format" to tell find/change how to edit the object. When you're finished click OK to be taken back to the find/change window.
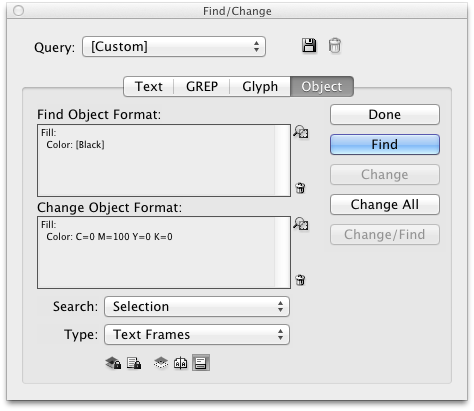
Both of the format fields should now have the styles you applied to them listed. Click find to make sure the correct object is selected, then change all for a global change or find next and change to move through the document. Below is the final layout with all of the find/change edits applied:

I hope you enjoyed these InDesign tips and put them to use in your future file creation. For some more InDesign fun check out our other blogs: How to Use Style Sheets & InDesign Keyboard Shortcuts.

